top of page
SOS Click - The click that will save you


Among the many functions the Microsoft Office suite has, one of the most imrpotant one which this blog post is going to focus on is the autosave function. This function, as the name suggests, automatically saves your work at regular intervals, mitigating the risk of losing data due to unexpected errors like a faulty hardware or a software bug.

First and foremosy, it is very important to keep it ON and not disable it because it's a true life-saver! However, you didn't come here to learn about it as there are other sources of information which already do that. Instead, you're more interested in bringing it to the next level, supercharging its behavior with the use of an add-in like SOS Click which focuses precisely on that.


SOS Click features three distinct autosave modes for your convenience:

  1. The standard mode which saves automatically at a fixed interval. No reason to add more about it.

  2. Keep history - This mode allows you to attach a timestamp to each document, spreadsheet and presentation, so you can have the same filename with different time signatures. This allows you to open the version of your choice directly from Windows Explorer without having to restore the file first or copy it over the current version. Some users are afraid of carrying out such an operation, and for them it's safer and better to have all versions in place so they can handle them directly like any other file.

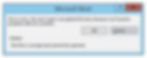
  3. Autosave for mail - This is a real game changer for some users, as it allows you to save your files to you mailbox and mailboxes. You can define one or more email accounts like Gmail, Microsoft Live, Yahoo mail to just name a few and have SOS Click send it at a fixed interval to these email accounts. This is a great saver however, one caveat though since it can flood your mailbox or mailboxes with duplicate messages containing your work as a file attachment, with each of them bearing a different timestamp depending on the configured time interval. So an interval of 5 minutes for e.g., means you'll receive an email attachment every 5 minutes to your email accounts of your choice. With SOS Click you can set up the autosave to be between 1 to 60 minutes (like the image below). In this case, you may just delete the exessive messages and leave only the most recent one or last two or three copies to be on the safe side.

The three autosave modes SOS Click features which the user can choose from
SOS Click autosave modes

To summarize everything - The autosave feature is a great function which shouldn't be turned off as it serves an extremely important purpose. With SOS Click you can enhance its use and supercharge its behavior to make sure your work is never lost.

Sometimes, when opening an existing Word document in doc or docx file format, you might encounter an error message like the one below and no matter what you try the document won't open.


In certain cases, Word will also exit without letting you take any further action. In this case you have two options:

  1. Open the document from a backup copy if you have one or

  2. Try to open it in a different program other than Microsoft Word like WordPad or Google Docs which this post is going to be about

Follow these steps in order to open your corrupted document with Docs and then download it to open it normally with Microsoft Word:


First, launch Docs using Google's 9-dot square button:


You may also access Docs directly using the docs.google.com URL which will lead you to the same place.

Next, create a blank document by clicking on the colorful plus sign (leftmost):


Once inside the blank document, click on File->Open:


In the new window you need to upload the faulty document by going to the last tab "Upload" and navigate to the bad file by clicking on the "Browse" button:


Finally, the document should open with Docs and you can now proceed to download it as a Word document from the previous menu we used after creating a new document or you may use Google Docs to continue editing the file if desired:


You're done and may proceed now to edit the repaired Word document. Try to remove bad elements which could have caused this issue from the start like tables and web elements just to name a few.


This method can also work with corrupted Excel workbooks and PowerPoint presenations for which Google has you covered too with Google Sheets and Google Slides.


People working together

In today's data-driven world, safeguarding your valuable files is paramount. Whether you're working on crucial business documents or treasured personal memories, having multiple copies in different locations ensures data security and accessibility. In this article, we'll explore the best way to save your files to multiple destinations with a single click, including local storage, network resources, and cloud services, all while harnessing the power of Excel's AutoSave feature—no VBA macros required.


Top reasons to save documents in many places may include:

Saving to multiple destinations is a proactive approach to data protection. It guards against various risks, including hardware failures, accidental deletions, and cyber threats. By distributing your files across local and remote locations, you ensure redundancy and accessibility.

Utilizing Excel's AutoSave Feature:

Excel's AutoSave feature is a known and trusted way to save when you forget. It automatically saves your Excel active workbook or another file you choose to open with Excel like CSV at regular intervals, reducing the risk of data loss due to crashes or unexpected errors. To enable it, follow these steps (applies to Word and PowerPoint too):

  1. Open Excel.

  2. Click on "File."

  3. Select "Options."

  4. In the Excel Options dialog, navigate to the "Save" section.

  5. Check the box for "AutoSave OneDrive and SharePoint Online files by default."

  6. Choose your preferred AutoSave interval (e.g., every 5 minutes).

Now that AutoSave is set up, you can focus on saving your files to multiple locations simultaneously with a single click.

The Best Way to Save to Multiple Places in One Click:

  1. Local Storage: a. Click "File" and select "Save As." b. Choose your local storage location (e.g., your computer's hard drive or an external drive). c. Give your file a name and click "Save."

  2. Network Resources: a. Access your network drive or resource where you want to save the file. b. Click "File" and select "Save As." c. Choose the network location, specify the file name, and click "Save."

  3. Cloud Services: a. For Dropbox, Google Drive, or OneDrive, ensure you've installed their respective desktop apps. b. Save your Excel file to your local computer (AutoSave will automatically update the cloud copy).

  4. Email Accounts: a. Click "File" and select "Share." b. Choose "Email" and select the email account you want to send the file from. c. Attach the Excel file and send it to your desired email address. This creates a backup in your email account.

By following these steps, you can efficiently save your Excel files to multiple places in one click, including local storage, network resources, cloud services, and email accounts, all while leveraging the power of Excel's AutoSave feature. This comprehensive approach ensures data redundancy and accessibility, providing peace of mind in a world where data protection is paramount.


bottom of page